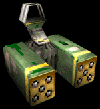
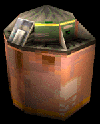
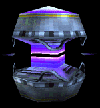
The default weapon of the game. There are 3 levels of power representing the
rate of fire of the weapon; when you spawn you start with power 1. You can fire one single projectile at a pretty low fire-rate,
but at least it is better than nothing and it is sufficient to survive some time if you have good defensive tactics. You should try to upgrade your pulsar power by collecting power pods
as soon as possible. With the maximum power 3, the pulsar is a well balanced
weapon. To maximise your accuracy with the weapon, you should aim towards the
path of your opponent's direction and not directly them. It is an effective
weapon in dog fights due to it's rapid fire rate (on power 3) and the potency of
it's damage. Try to avoid using the weapon at long distance because of the time
it takes for the projectiles to meet their target, it can be easily dodged.
Even with just this weapon in your arsenal, you can be a nightmare...
|
TROJAX:
|

|
Trojax is the favourite weapon of many, best used at short to mid-range. The main reason for this is
the enormous damage inflicted upon the enemy; a single hit can cripple your opponent. Acclaim thought this
was unfair and caused unbalanced game play and so reduced the efficiency of trojax when they released
patch 1.01.
Trojax is great for offensive and defensive use. However, it is weak when aiming
at a player running from you because of the slow speed with which the
projectiles fly. In addtition, it is not a rapid fire weapon, there is a
significant time delay between each shot being fired off (even without charging
the shots). Try to out-manoeuvre your opponents so they have little room to move. Then calculate where they could fly next to escape and shoot slightly towards that direction.
Notice that you can charge the trojax: keep the fire button depressed for about 1.5 seconds and then release it. Notice that anytime you charge the trojax,
a little green bar is growing beside the crosshair. One blast from a fully
charged trojax will almost inevitably result in death for whomever is
unfortunate to be on the receiving end. However, you will find it hard to hit experienced players with a charged trojax
because of the slowness aforementioned.
Learn to "spread" the trojax. This means you should try to cover as wide an area
as possible with fire, rather than aiming at the same spot continuously, especially if the opponent is still some distance away.
Alternatively, it might be useful to create a straight line with the projectiles when the enemy is hiding behind some corner, forcing him to stay there or move right into the deadly "trojax-wall" (You may use homing missiles or
a titan to make him move away from where he is hiding).
|
LASER:
|

|
The laser has one main advantage: it is an instant hit weapon (it takes zero
time to hit it's target). This is very useful when there is a large distance between you and the opponent
where normally pulsar/trojax/transpulse projectiles would be easily avoided. This way you can snipe your opponents,
whilst maintaining a safe distance. However, the laser can overheat and it is very often not the best choice when playing over the internet (due
to lag). If you have problems hitting others with the laser you should try to adjust the sensitivity of your mouse/joystick. Additionally, you should not keep the fire button depressed whilst using the laser, so you are not bound to the default fire-rate; this will also avoid overheating.
Do not use the laser in short-range fights, unless you really know what you are doing
(e.g. you have excellent accuracy and your opponent is close to death) . You
should also consider switching to Trojax when you are under fierce attack. An opponent flying at full speed with the "golden power pod" is very hard to stop with the laser.
|
TRANSPULSE:
|

|
The transpulse has a homing capability. When you fire it against a wall and an enemy is at hand (i.e. visible) the projectile will bounce off the wall, heading for the enemy. Thus it is possible to hit people hiding behind corners. It is not as efficient as the trojax, but still a deadly weapon.
It is usually turned off in online-games, as you can kill others easily even if the ping is bad.
|
SUSSGUN:
|

|
The sussgun is a short range weapon as is the pyrolite. Both come along with separate ammo. The sussgun projectiles cover a wide area, so hitting others close to you is quite easy. If you are very close to another player the efficiency of the sussgun can be amazing.
Use it in near range fights (especially to finish off your opponent) and for defensive purposes, but also if there is great lag and you have difficulties to hit others.
|
PYROLITE:
|

|
The Pyrolite works like flame-thrower. Thus, it is very powerful but has a short
range and should be used accordingly. The flames are able to bound off of the
walls, ceilings and floors and hence can reach around corners, which makes it
especially useful in narrow and enclosed environments. An effective tactic when
equipped with the Golden Power Pod, is to hold down the fire button and fly past
your enemy, hoping to catch them within your flames.
|
MUG:
|

|
The mug-missile is the default missile, pretty slow and without homing capabilities. One hit with mug still means a remarkable decrease of your hull or shield. Pine mines also fire mug-missiles. And you know pine mines firing at an enemy can be effective..
Most people however simply forget to use these missiles.
They come in handy, when you respawn and have to defend yourself.
|
SOLARIS:
|

|
The solaris missile is the default homing missile. It is pretty fast and best used at narrow passages. Remember solaris missiles come in packs of three, it may be a good idea not always to shoot three solaris (or more if level/settings admit it) at once. You may shoot two of them and then wait a bit to shoot the third. The enemy will be trying hard to avoid the two thus not concentrating on the third and then maybe be confused and hit. Another possibility is to shoot the solaris in slightly different directions, so they home in on their target from different angles (mainly useful if you are not too far from your enemy). If you are experienced you may also want to shoot homing missiles without an enemy being visible. Imagine another player hides behind a corner: Shoot a solaris which must pass that corner and it will home in on him (if there is enough time for the missile to reorient itself before it passes the enemy).
Also, if you know the level, and hear a bike approaching you can fire a missile into the direction you know the enemy is coming from. If you are skilled in this, the other player won't find the time to react. However, when you launch a missile, this can be heard by any player being close enough to you. Turn off CD music so you can better observe others firing at you. Because of this some players shoot a missile even if they do not hear another bike approaching (thus the other doesn't hear the missile as well). This is only advisable if you are an experienced player and have some skills in calculating where other players must be within a level.
|
SCATTER:
|

|
The scatter-missile is very much like the solaris. Only is it even a bit harder to avoid and can only be picked up as a single missile. But the main difference can be found in the effect of the weapon when it hits another player. His hull/shield is decreased for one but more important, he is deprived of all his weapons save pulsar power1, his weapons are "scattered", and remain where he has been hit.
This is a great effect, as you can confuse other players with the scatter, or successfully attack enemies with superior weapons.
A common combination to use scatter with is solaris or titan. When the player is scattered he might be confused and hastily try to gather the lost weapons again taking no notice of solaris or titan heading for him.
So be careful when you are scattered: It may be better to flee than to run into death. Most important: Do not lose your mind but watch if you are taking a high risk or not when trying to pickup the weapons again. Also you might concentrate on re-gathering the important weapons like titan and then either flee or kill the other while he/she is trying to collect the scattered weapons.
|
MFRL:
|

|
The multiple fire rocket launcher (mfrl): A deadly weapon if used properly. As long as you keep the secondary fire-button depressed, up to 100 little missiles with no homing capability are heading towards the direction your crosshair is pointing to. Mfrl is very fast and the fire-rate is incredibly high, the missiles build up a single line if you don't move too much when shooting.
While using mfrl to cover a certain spot with the projectiles is very common, it is often advisable to "spread" the mfrl: Move/Rotate while launching the little missiles. It is also a good idea not always to use mfrl until all 100 missiles are gone. If you observe that the projectiles are obviously not heading in the right direction, stop firing and reposition yourself before you shoot again.
Mfrl is a great offensive weapon, stay away from narrow passages when others have it.
|
TITAN:
|

|
The titan star (titan) is the most destructive weapon in the game. It combines lethal efficiency with speed, a huge radius of impact and a homing capability. If you are a less experienced player, the terms "speed" and "homing capability" might have confused you. It is true that the initial speed of the missile is very slow. Once it hits a wall or another player, the titan explodes and all resistance within a great area is erased. But it is not the explosion which causes the greatest impact: When hitting a wall or player the missile divides itself into some other missiles smaller in size but very fast, bringing instant death and each heading towards the spot where an enemy could be seen when the titan hit a wall.
A common mistake of less experienced players is to try to directly hit an enemy with the titan which is very hard to do; as mentioned before: the titan itself is very slow. So in most cases it is a good idea to make use of the fast projectiles, by intentionally shooting the titan against some wall, floor or ceiling. You might try this: hover only some inches above the floor, while pointing the crosshair on a spot close before you on the ground - and launch the titan. - If done properly you won't take any harm. Also you can fly with the golden power pod while touching the ground and then launch a titan right with your nose facing on the floor (while still moving forward at full speed) - you won't lose one point of off your shield after you have practised a few times. Learn to use the titan that way, most good players only scarcely let the titan pass a longer distance.
You should still be careful when using this big baby: Imagine you observe an enemy via the rear-view (F6) approaching from behind but still some distance away. But before you can turn round you are a facing an enemy right in front of you. You quickly point your nose to the ground and launch the titan: boom! - smoke.. what was that?!? "you killed yourself". Remember that the titan projectiles head towards enemies being "visible" for the titan when it hits a wall /floor/ceiling. In this example there were two enemies being visible. So some projectiles headed for the one in front of you and the rest "decided" to greet the one behind you, therefore meeting you on their way.
|
GRAVGON:
|

|
The gravgon is a tactical weapon. When hitting the ground it creates some kind of "force field", dragging all players in range (including yourself) within its radius, before it vanishes after some seconds. It is hard to overcome the force of the gravgon and escape from it once you are caught in one. But it is possible with triple chording when the gravgon-field covers a corner. Use the corner to move away from the centre of the field - it is not easy unless you have the golden power pod. When you are caught in a gravgon and have the gpod do not lose your mind. The more you move up-down or left-right, bouncing against wall, floor or ceiling, the less effective your escape will be. Try to position your bike correctly instead, so you hover parallel to the ground and then activate nitro.
Many people simply neglect the gravgon. This is a bad habit for you can greatly profit from it. For example you can block narrow passages with it. Also you can shoot it towards an enemy during close-range fight (works best if there is not too much room, e.g. deadlocks) . Shoot it in a non-horizontal angle, so it passes the enemy and hits floor or ceiling somewhere behind him. His action-radius is now limited because he needs to stay away from the gravgon-field behind him and at the same time has to concentrate on your attacks.
|
PURGE MINES:
|

|
The purge mines come in packs of three as do the pine-mines. They are not as deadly as quantum or pine mines, yet they are great for defensive use. As the other mines they attract homing missiles (solaris and scatter): If you know a homing missile is approaching behind you and you do not have enough time to out-manoeuvre it, simply lay a purge mine and the solaris/scatter-missile will head for the mine instead of homing in on you.
Purge mines also come in handy, if there is some enemy chasing you being close behind: Lay the mines (preferably in a narrow passage) and watch him burn or at least delay before the "mine-wall" in anger.
|
PINE MINES:
|

|
The pine mines cause great impact when a player touches them. The range of impact is far greater than of the purge mines, yet not as huge as of the quantum mine.
Pine mines are pretty tactical: They shoot mug missiles at enemies all by themselves. Position them in narrow passages/tunnels or use them to block deadlocks.
Different from purge mines or quantum mine, they will not explode once they are hit by a single projectile. They are more resistant.
|
QUANTUM MINE:
|

|
The quantum mine is lethal when touched. Its radius of impact is enormous.
Be careful when you lay the mine with an enemy or missile closely following behind you.
A common tactical use of the quantum mine can be found in combination with the laser: Lay the quantum mine beside some corner, where you expect an enemy to pass by. Fly some distance away and aim with laser at the mine, but don't shoot yet. When you hear/see an enemy coming pretty close to it, trigger the mine with the laser. To be successful with this method you require some experience and knowledge of other player's habits.
Notice that the quantum mine is emitting a strong blue light, so it can be easily detected, unless you position it behind corners or areas with blue textures.
